Just a quick post to let you all know about the blog candy on offer from Kath of http://kath-allthatglitter.blogspot.com to celebrate her 2nd blog anniversary! this is what she is offering up:


Isn't it gorgeous?!!!! Lots of scrumptious items there!

If you want to be in with a chance to win these goodies, you need to put a link to the candy on your blog (like I am doing right now ;) ) leave a comment on your blog and leave your name with Mr Linky here. You have until midnight (GMT) Tuesday 9th March to do it ......... so what are you waiting for?

Well, yesterday was a busy day. One of my friends from University was up visiting, so we decided to go to Warwick Castle for the day. It was almost 11 am when we got there and, of course, I took my camera! I had a minor panic on the path from the car park to the castle when I thought my camera battery had run out, as I was trying to take some photos of a peacock on the wall above us but the camera would just not work...... it turned out that I hadn't even put the battery in! Talk about forgetful! I guess that was another one of those senior moments that are becoming all too familiar ;).

Anyhow, there were 5 of us altogether, my daughter and two of my sons, my friend Catherine, plus myself. Apart from the moanings and groanings from the elder of my boys, we had a wonderful day. The only moanings and groanings we had been expecting were from the dungeons but you would not believe how much an 18 year old can complain when he feels hard done to because he is carrying the heavier of the two backpacks we had with us! Anyway, fortunately for us (since we had to listen to his complaints), the backpack gradually became lighter throughout the day....

This is the view of the castle on the approach from the car park:


Once you get inside the castle grounds, you can actually go inside most of the rooms, and here is the dining room leading off the Great Hall:


This is a portrayal of life in Tudor times:


The castle is one of the largest complete castles I have been in and is in remarkable condition. They do carry out substantial renovation work, and it certainly pays off. This is the view of the inner courtyard:


More inside shots:


Everyone was dressed up in medieval costume, and speaking the way people would have spoken back then. We actually got to see the Trubuchet in action. This is like a huge catapult which was used in sieges to attack the town, and it was quite something to see it in action. This photo is of the Trebuchet just as the shot was about to be released:


Of course, I was so busy taking photos, that I actually missed the shot landing on the other side the field as it moved too quick for me to follow with the camera!

We had lunch in the peacock garden, and here is one of the peacocks displaying his feathers:


There were several peacocks and a few peahens, and they came up really close, wihtout any apparent fear of us.

Later in the afternoon, the sun came out so it was lovely down by the river, although it was still cold. This the view from the Mill:


You wouldn't think we were only standing on a narrow platform above the mill wheel as the photograph is deceptive. There are actually fairly high walls up on the left and you can't really see the river that well unless you stand where we were. Looking the other way up the river, we could see the sun going down behind the castle walls.


Of course, my youngest couldn't resist the gift shop, and ended up buying this:


It's a ginormous plastic thing that you stick in a long narrow plastic bottle filled with soapy water, then you release it and it opens up into a triangular shape. If you are very careful, and with a bit of practice, the soap remains on the triangle and you (or at least my son) are able to make huge bubbles!

Well, as a treat for staying with me through all my boring photos (you'll be pleased to hear I did restrict my posting to just 10 although I took over 400 photos whilst we were in the Castle!), here is an add on to my share of the Free Spirit kit:


It is a set of three stems and fourteen blooms that you can mix and match to create your own flowers. I hope you like it and it can be downloaded here.

Happy scrapping!


Well, as mentioned in my earlier post, the ADSDesigners bi-monthly blog train is released today and here are the previews for my share of this kit:


I have only seen two sets of previews so far, but as usual, you can expect some gorgeous papers and elements. You can find my downloads here:


I split the file as it was slightly larger than the target of 40mb, but if you prefer just the one file to download, here it is.

And the others in the blog train are:


Happy scrapping!


Note: edited to correct the link to the combined download file. Thanks for letting me know, Mags!


Just a flying visit to let you know that the ADSDesigners latest kit, Free Spirit, is released today. I am in the process of putting together my previews and uploading my part of this kit, and will be back later today with the download links.

When I first started using Photoshop, I really didn't have a clue about what I was doing. It took me ages to even work out how to open up a new file (Ctrl N or File>New if you are curious!). I gradually became used to layers, finding swatches, using the various tools in the tool palette but brushes always seemed to be to be somewhat of a waste of space as after all, you could just copy and paste a flower rather than use a brush, or use clipart, or whatever and achieve the same result. However, after looking around at various blogs and reading/viewing tutorials, it became clear to me that brushes were so much more versatile than I ever thought possible.

So, first things first, what exactly is a brush? Well, it does exactly what you would expect it to do and behaves in the same way as a paintbrush. However, a Photoshop brush does far more than that. Depending upon the shape of the brush, you can paint lines, circles, dots, ribbons, notepaper, tags, ornamental shapes, plants, flowers, animals, grungify a paper, and a million and one other things, most of which I have barely touched!

You will find the brushes in your tool palette, which is usually on the left hand side of your screen (see picture 1).
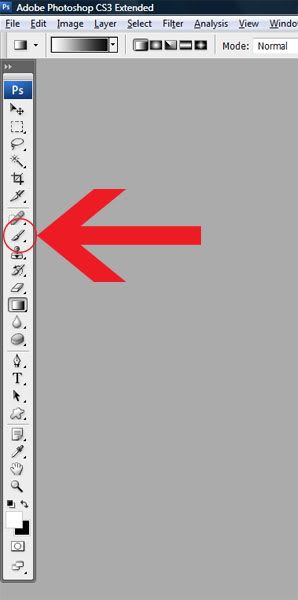
Picture 1

Photoshop comes with a number of brushes pre installed, but you can search on the internet for many others. Websites offering free brushes include:

http://www.brushking.eu/

http://www.brusheezy.com/brushes

http://www.damnedinblack.net/brushes.htm

http://www.deviantart.com/#catpath=resources/applications/psbrushes&order=24

http://myphotoshopbrushes.com/brushes

http://myphotoshopbrushes.com/brushes

http://www.obsidiandawn.com/brushes-categories

Check the terms of use if you want to use them for commercial or scrap for hire purposes.

To use a brush, firstly open up a new document (Ctrl N or File>New). Then click on the brush tool in the tool palette. Now in order to choose a particular brush, look at the toolbar and you will see on the left, just to the right of “Brush” there is a number (the size of the current loaded brush) and a drop down button (see picture 2).
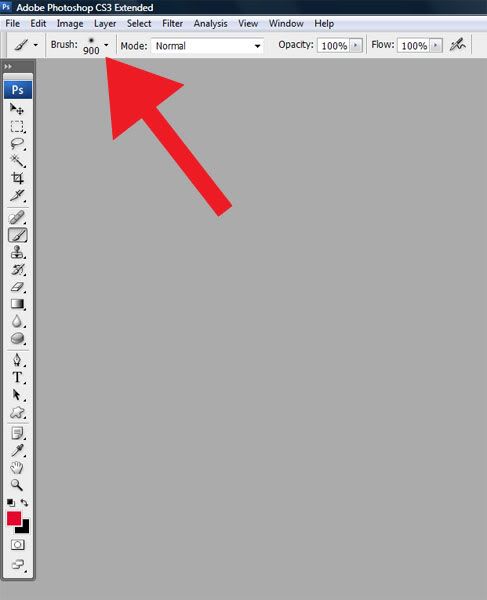
Picture 2

Click on the drop down button and you should then see thumbnails of the brushes that are currently loaded into Photoshop (Picture 3).
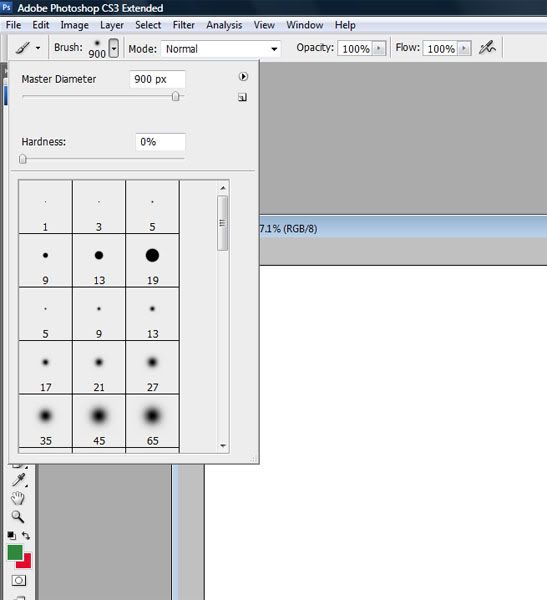
Picture 3

Then select the brush you want to use. If you have not used the brushes before, then the default brushes will be loaded automatically. However, if you know you have a particular brush that you want to use and it is not in the thumbnails, click on the drop down button to the right of the thumbnails. This then gives further menu options (see Picture 4). Note: If the thumbnail is too small to see clearly, just click on “Large Thumbnail" to make it larger.
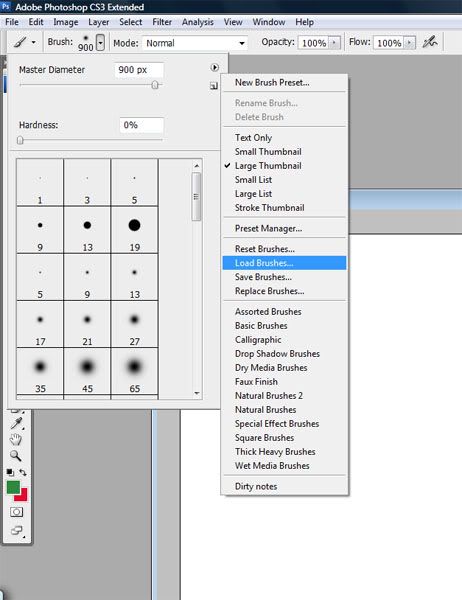
Picture 4

Click on “Load brushes” and then browse through to where your brushes are loaded. The default brushes are usually in the Photoshop preset files (you can usually find these under Presets in the Adobe folder in your Program Files) but it is a good idea to have a completely separate folder for your brushes (as well as actions, styles, patterns, etc). You will find that once you start collecting brushes, patterns, styles, etc, your Photoshop preset folders become very full and can slow the program up considerably. I actually have a separate hard drive for all my scrapbooking stuff, including all presets (as well as a further external hard drive for back up!).

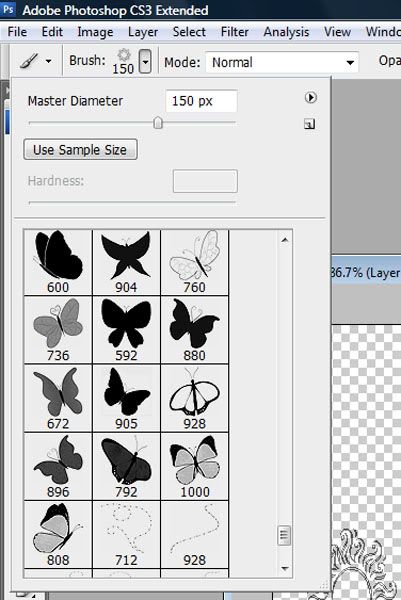
Pick the brush you want to use. I am going to use some Obsidian Dawn brushes as shown here in Picture 5 to make a butterfly overlay:
Picture 5

If the brush is too big or too small for the size of your canvas, then you can change the size by either going to the brush menu and changing the brush diameter (the master diameter in picture 5) or by using the square brackets on your keyboard (“[“ to reduce the size or “]” to increase the size).

Open a new layer in your document (either use Shift+Ctrl+N, go to Layer>New>Layer or create a new layer in the layers palette by clicking the second button from the right at the bottom of the layers palette). It is better to get into the habit of using a new layer for each brush as otherwise, you can find yourself painting over your background paper and not being able to undo it, whereas if the brush strokes are on new layers, you can edit them far more easily. If the worst comes to the worst and you have made one brush stroke too many, you can always delete the brush layer. If you only have the one layer and have used all the brushes on that, then you may end up having to start all over again as you may not be able to undo or edit out all the brush strokes.

Check the colours in the colour palette are the ones you want to use and then just start using your brush.

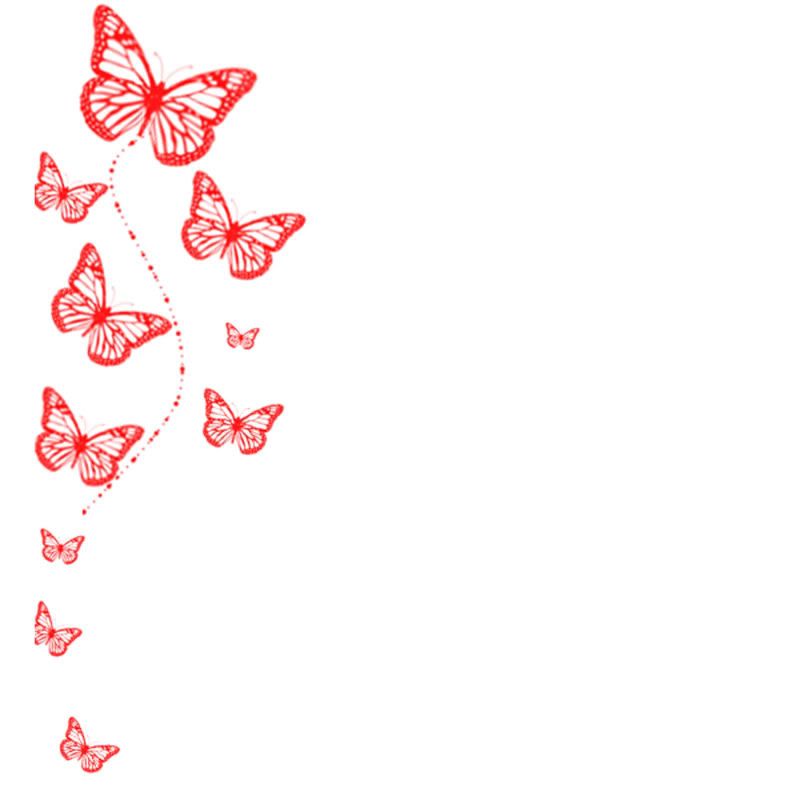
I started with a transparent document (since I am making an overlay) and then used one of the butterfly brushes and a trail to produce a set of butterflies in flight (picture 6a).
Picture 6a

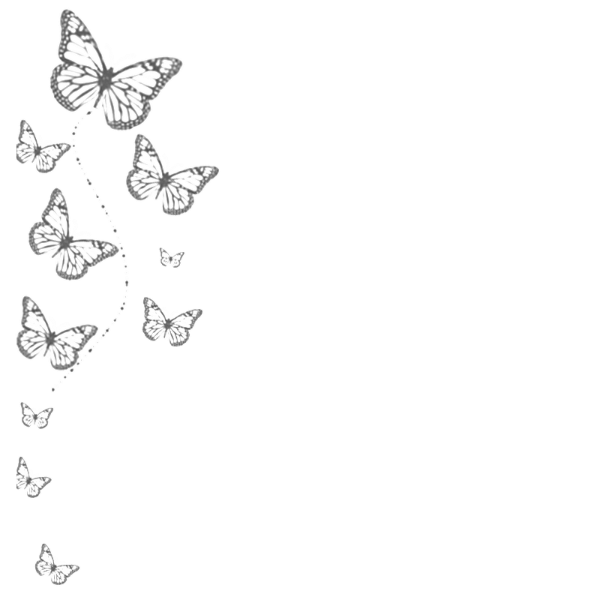
I then desaturised this (Image>Adjustments>Desaturate or Shift+Ctrl+U) to take out all the color and ended up with a grayscale set of butterflies as shown below.

Picture 6b

Once you get that far, it is then a case of just using the overlay either in a layout as a separate layer or design your own a paper by adding new layers above and below and playing with textures, patterns, blending modes and so on until you get the desired effect.

In my case, I carried out the following steps:

1. Added a new bottom layer and filled that with a colour;

2. Created a middle layer using a photo I had previously taken of some marble (see picture 7).


Picture 7

It is not a particular good shot as I could not keep the camera still, but that really doesn’t matter too much when using the photo as a texture or background pattern, which is just as well seeing as it is a really blurry photo!

3. Desaturised the marble photo and increased the size to fill the canvas completely (use the transform tool);

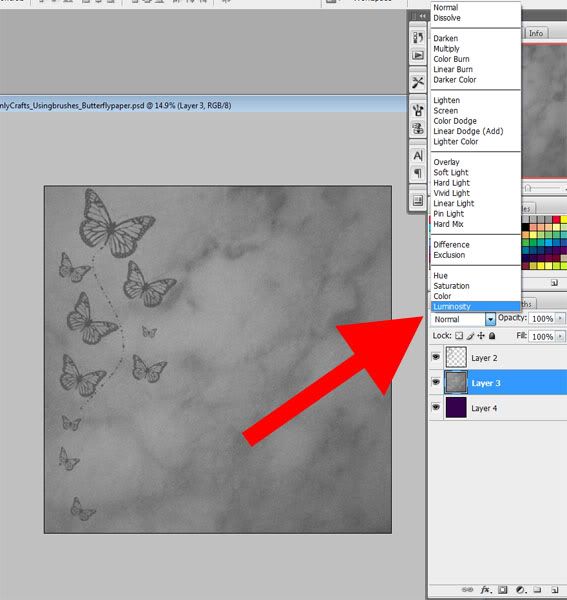
I then had three layers and so I played around with the blend mode (see picture 8) of the photo layer and the butterfly layer to get the effect I wanted.
Picture 8

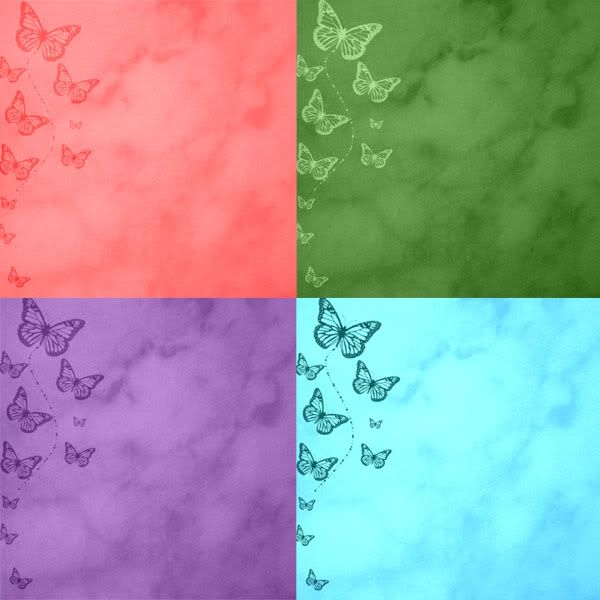
I ended up with a selection of four papers as follows:
Picture 9

As you can see, the marble photo, even though it was blurry, has added a cloud effect to the paper, and the use of the blend mode has changed the way the colors and butterflies look.

Why not have a go yourself and see what you can come up with? There is no such thing as a wrong way to do this – and the undo button is a great help!

The butterfly overlay, marble photo and four papers are available as a free download here.

Note: this tutorial was first published in Bellascraps
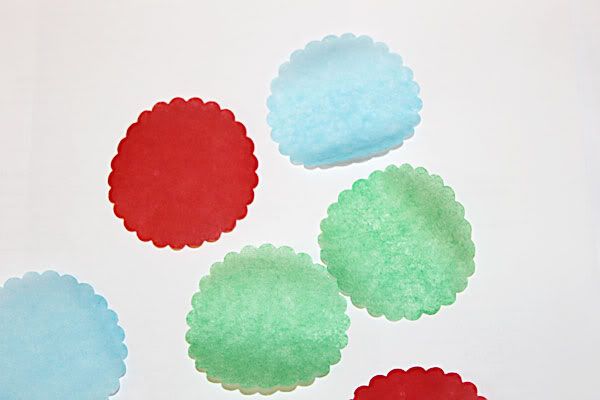
The next step from digital designing for me is to use digital images and so on to make my own cards, gift bags, etc. But I am still learning here, and one thing I discovered this week is how to make flowers to decorate cards and so on. Whilst most of you have probably been doing this since you were knee high to a cradle, it is all new to me and I thought I would share with you what I have made.

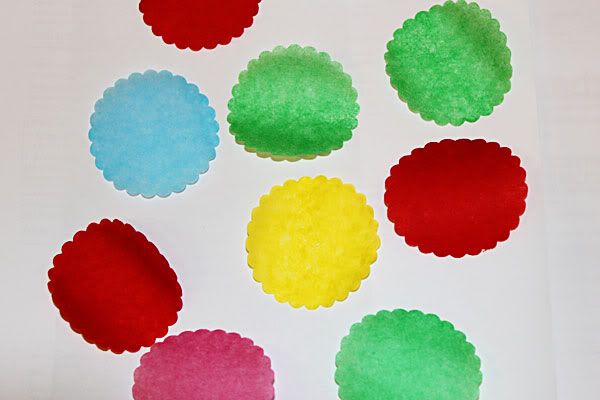
The first thing to do is to cut out circles for the petals of the flowers. I used my Woodware scalloped circle punch here, which makes a circle with a 2" (5 cm) diameter. You could use a plain circle punch, a circle cutter or just draw round an egg cup or similar to get the circle shape and then cut it out.

I've found that using cardstock for this is too heavy. You can't crumple the petals as well when the paper is heavy and it doesn't look anywhere near as effective. I ended up using tissue paper and punched through several layers at once - I used sheets of tissue paper, tore off a strip from the end of the sheet about 3" wide and then folded it in half. I folded it in half another two or three times making sure it would fit into the punch and I ended up with 8 or 10 scalloped circles depending on how many times I folded the tissue over).


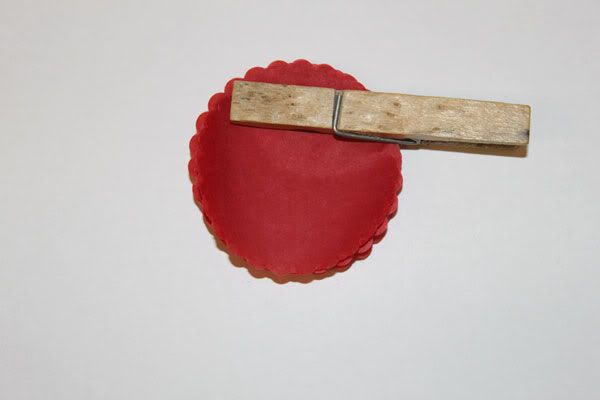
As you can see, I ended up getting carried away with the punching! You need probably between 8 and 10 circles for each flower, although if the paper is heavier, you would need fewer layers. Clip the layers together. I used the ever ready household peg as you can see here, but you could use a paperclip, bulldog clip or whatever you have to hand to keep the petals together:


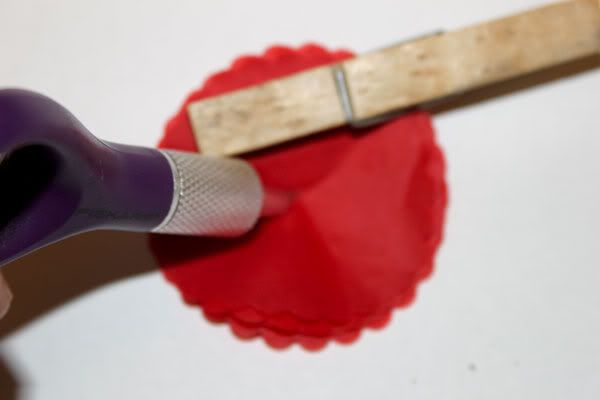
Then carefully use a pokey tool (or whatever they are called) to put a hole through the centre of the flower.

I apologise in advance for the next photo. I am still getting used to my new camera and holding the camera in one hand and the flower in the other meant I had problems keeping the camera still. As a result, my Fiskars finger tip craft knife (I don't have a pokey tool thingy so usually end up using a craft knife) is in focus but the flower is blurry! Still, at least you can see what I was doing.....


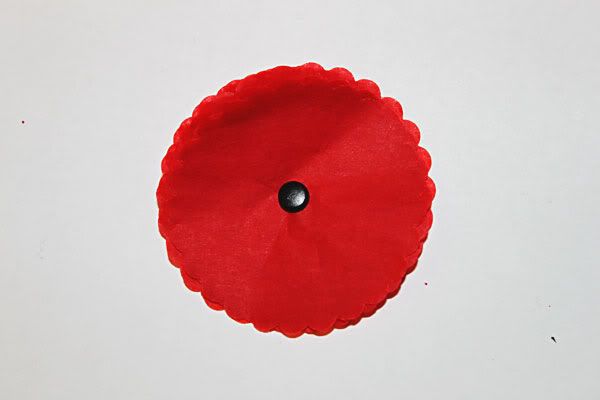
Insert a brad into the hole to keep all the petals together. You need to do this carefully to make sure you do not tear the tissue.


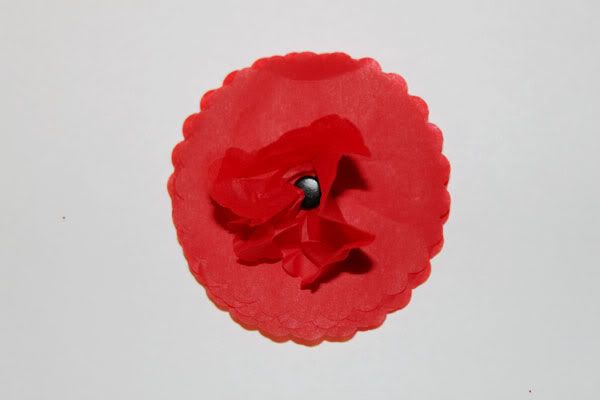
Then scrumple up each petal starting with the top one:

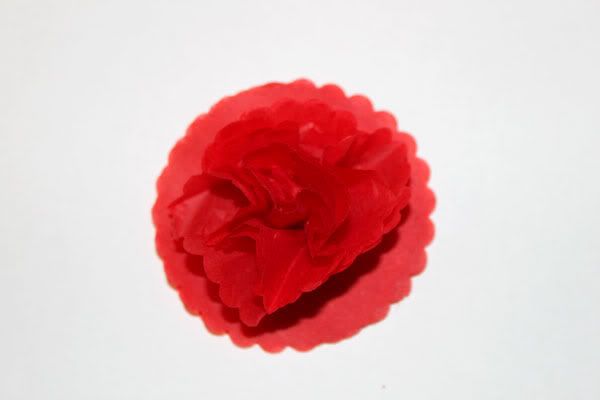
Carry on repeating this with each layer, working you way down to the bottom layer. Leave the bottom layer unscrumpled. You can see how this gradually builds up a realistic looking flower (well, about as realistic as tissue paper can get, anyway!):


And more scrumpling later:


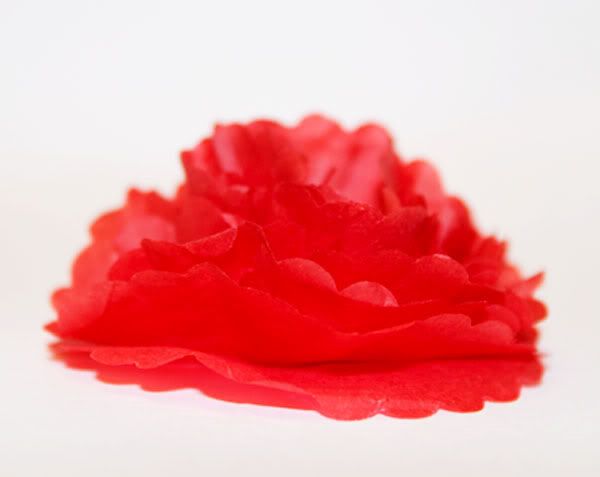
As you can see from this side view, the scrumpling has given the flower some depth:


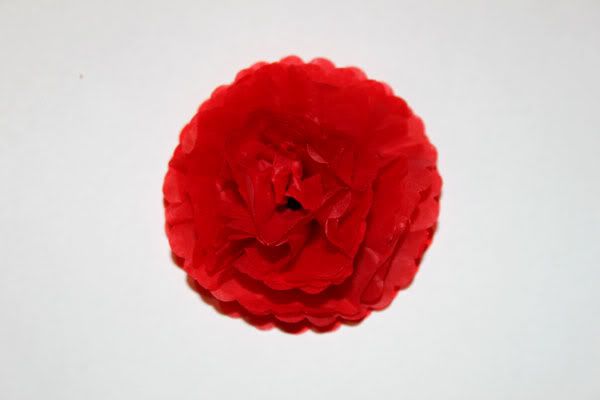
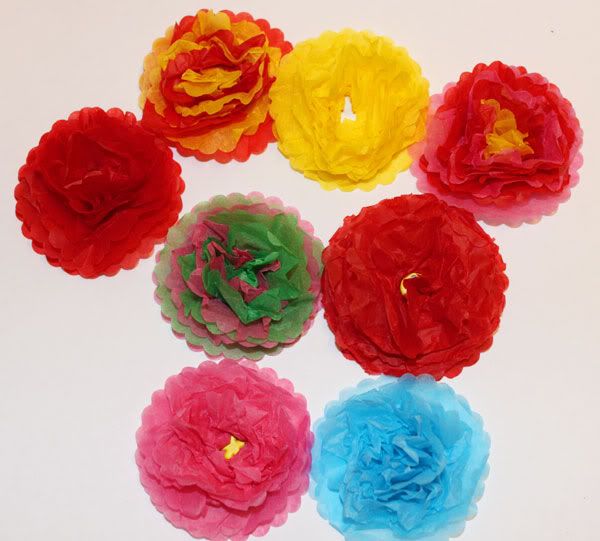
And in true Blue Peter fashion, here are some I made earlier:


You can then use these flowers for all sorts. One trick is to use left over scraps of paper to make stems, and then you can either use a leaf punch or skeleton leaves for the leaves. They can then be stuck onto patterned or plain paper on a card. You could also use those thin gardening sticks as stems and then stick the flowers on the top and place in a vase or other container.

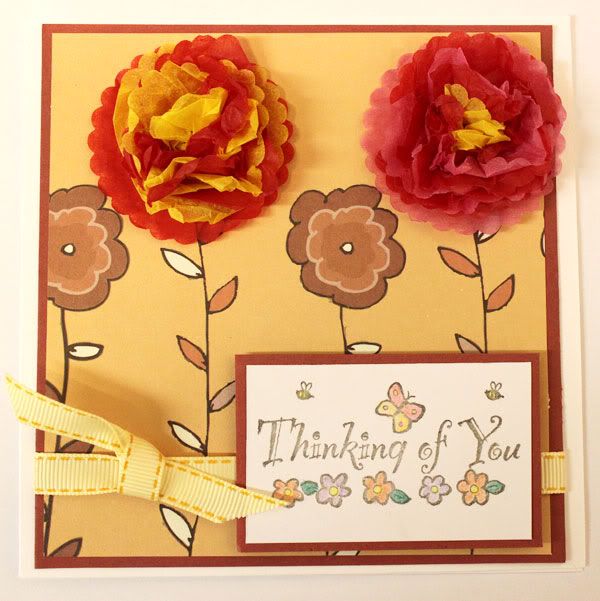
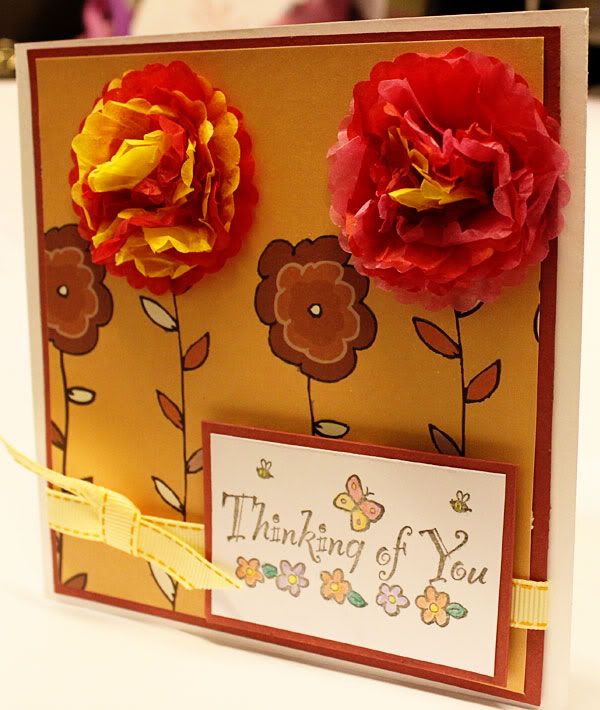
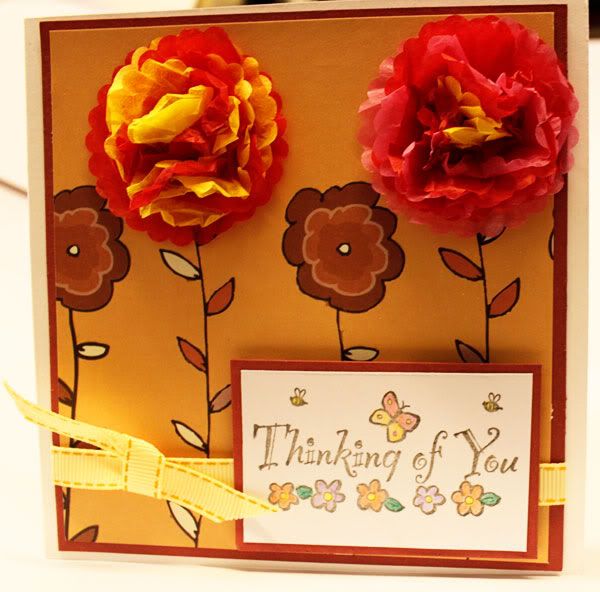
One of my friends is going into hospital next week so I decided to use the flowers in a card for her. I used some Papermania paper (from the Earth Tones collection) mounted on contrasting paper and stuck the flowers onto some of the flowers on the paper:


I used a docraft stamp for the message, embossed this onto plain white cardstock and then coloured this with watercolour pencils, mounted it onto the plain paper and stuck it onto the card along with decorative ribbon.
Sorry about the colour in the photographs. My office is in the converted garage and there is no natural light in here at all, so taking photos is somewhat of a hit and miss affair colourwise.


Hopefully, she will like the card - provided I remember to post it of course!

I'm hoping to be back later today/tomorrow with some more overlays. I've been out and about using my camera again (well, only out and about into the back garden, but hey, that counts too, surely???!!!!).

In the meantime, happy scrapping!

Well, I don't know where the time went yesterday as I seemed to be busy all day but achieved nothing! I ended up just pottering around on the computer all afternoon, then had to take DD to Crewe railway station as she is in Manchester this weekend visiting a friend. It;s only the second time I have been to Crewe and the station there is apparently the third worst station in the UK! We got there in plenty of time for the train but managed to spot the station car park on thw way, and then spend at least five minutes getting around the roundabout to go back to the car park!

Of course, we went in the short stay car park where it is free parking for 20 minutes and then £10 for very hour (or part thereof) after that. I thought I would have plenty of time to walk with dd to the station and get back in time but she wanted me to wait whilst she bought her ticket (and of course the queue was horrendous and so slow moving!) as well as escort her down to the platform. It was only when we got to the platform I took out my parking ticket and realised I had 2 minutes to get back to the car park before incurring a £10 charge....I must have looked like a crazy woman running back to the car park, especially considering the road was busy and I had to wait for the lights on the pedestrian crossing to change so I was in a real panic by the time I got back to the car. Then, of course, I couldn't get the car close enough to the ticket machine on the way out, so had to get out of the car to out the ticket in. I managed to get the ticket in at exactly 18:07, 20 minutes after I arrived there, and so escaped the £10 charge, what a relief that was!

Anyhow, I then got back home and finished off the card I started making in the afternoon and here it is


I used Papermania paper and a butterfly punch along with some ribbon and cardstock I already had in and am quite pleased with the results. I'm slowly getting better at making cards but there are so many different techniques and I have so much to learn ;).


This morning, I have been messing around in Photoshop and have finally managed to zip up the overlays I made last week. Here they are along with some freebie papers I made with them:


The above papers are just made using the overlays, changing the blend modes and adding a default Photoshop texture. I've included them in the zipped file along with the png overlay files.


You can download the file here. I'd love to see what you make with these so feel free to post your links below.

I'm off to make lunch for my youngest son now, so happy scrapping.

I've been sorting out the office. Well, not sorting as such, more of a tidying up as I had about three feet of tax returns, accounts and other correspondence that I had just filed (ie dumped on one side in a huge pile) and I have now got around to putting them all in files....12 of them! I now need to set up a database and list them all in there so I can find everything without having to plough through 12 lever arch files every time. Oh. the joys of running an office, I can't wait!


I have spent some time photoshopping though, and currently have a few overlays and some extractions to share, but need to zip them up and upload them to 4shared. I am hoping to get this done later today but I have a very important appointment at the hairdressers for my bi-annual perm this morning (!!!!), so may not get chance to post anything before I go.

See you later!

Where does the time go? It seems eons since I was last here and I am now absolutely exhausted after the January tax return filing deadline. After several nights of not getting to bed until 4 am, and one or two nights of not getting to bed at all, I managed to get all the tax returns in but now need to take this week off to recover!

We've been shopping at Ikea, bought a great new shelving unit for my office, spend quite a bit more than I intended on craft stuff (and oh, boy, I bought a heat tool and it is awesome...I have been wanting to learn how to emboss for some time and it is brilliant!) and our eldest son is coming round shortly to finally finish off my Heavenly Crafts website!!! That means, of course, that I hope to be selling stuff shortly so will be moving my designs to the website. If you want to grab anything now whilst it is free, please do so :).

I'm also considering becoming a demonstrator for a stamp company and selling their stamps on my website. what do you think? Is this something anyone would be interested in (buying stamps I mean!)? It would have to be for UK customers only at present due to delivery costs though, should I go ahead with this?

Anyhow, I'm off to do some major sorting out in the office now, plus do some photoshopping as I have really missed that these past few weeks. In the meantime, I am leaving you with a quick look at the card I made last night:


I used the Martha Stewart pop up butterfly punch for the edging. This was one of the things I treated myself to after all the hard work in January! The teddy bear was from a stamp (also a treat!) which I stamped onto white card and then embossed, and coloured in using watercolour pencils. The background paper is from my stash and I can't remember where I got it,but it might be Dovecraft if anyone is interested.One of my boys said it was the best card I had ever made, although considering some of my efforts, that is not necessarily saying an awful lot!

Happy scrapping!

Happy New Year!!!

Well, it seems an age since I was last here, so apologies for that. December and January are my busiest times of the year for work. We have a 31 January tax return filing deadline here in the UK, and as a self employed accountant, I have masses of returns to do. I end up working through Christmas, the New Year and keeping very late/early hours as I struggle to get everyone's accounts done.

Did you have a lovely Christmas and celebrate the New Year in style? We had a very quiet Christmas spent with the family, which was really lovely. At the moment, our eldest son and his girlfriend are here (but I think they go back today), middle son is home from Uni until next week sometime and daughter is away in Manchester visiting a friend. The boys are really disappointed not to have had more snow. We had about 2 mm last night and it has now frozen over so that walking from the house into my office (aka the garage!) is like walking on an ice rink, even though I only have to walk a few feet! And what's more, because we only had a little bit of snow, I haven't been able to take many photos as it disappeared so quickly, and I had a brand new camera for Christmas, something I have been wanting for absolutely ages!! David Bailey, watch out, because here I come!!!!

I've been practising with my camera (there are so many buttons and dials I only know what two of them are for!) and taken pictures of grass, snow, wood, plants, bricks as I am determined to get some decent textures to use in creating background papers. So watch out for those at some point in the future! But realistically, I won't get any designing time in this month as work is hectic. I have about 40 tax returns to do plus umpteen sets of accounts to go with them, so I have no free time at all.... :(.

I did squeeze in an hour yesterday though, and managed to create a desktop.


It's only 1280 by 1024 and personal use only I am afraid but I have included in the zipped file:
  • My own desktop with the photo of the swans on the frozen canal;
  • Two png files, one with the black mask and the other with the mask deleted;
  • The mask file; and
  • The psd file.
That way, you can either select the black mask or transparent mask area (you'll need to keep Ctrl pressed down to select it all). Then copy and paste your photo as a new layer above the mask area and clip it to the mask area (Layer>Create clipping mask). Alternatively, use the psd file. Feel free to download it here.

Happy scrapping! I'm off to do a VAT return now, exciting stuff, eh?!!!