Photoshop for beginners: Using brushes to make overlays and papers
3 comments Posted by Lynn at 2/22/2010 11:31:00 amSo, first things first, what exactly is a brush? Well, it does exactly what you would expect it to do and behaves in the same way as a paintbrush. However, a Photoshop brush does far more than that. Depending upon the shape of the brush, you can paint lines, circles, dots, ribbons, notepaper, tags, ornamental shapes, plants, flowers, animals, grungify a paper, and a million and one other things, most of which I have barely touched!
You will find the brushes in your tool palette, which is usually on the left hand side of your screen (see picture 1).
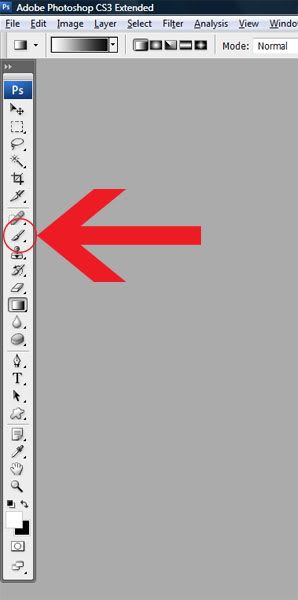
Picture 1
Photoshop comes with a number of brushes pre installed, but you can search on the internet for many others. Websites offering free brushes include:
http://www.brusheezy.com/brushes
http://www.damnedinblack.net/brushes.htm
http://www.deviantart.com/#catpath=resources/applications/psbrushes&order=24
http://myphotoshopbrushes.com/brushes
http://myphotoshopbrushes.com/brushes
http://www.obsidiandawn.com/brushes-categories
Check the terms of use if you want to use them for commercial or scrap for hire purposes.
To use a brush, firstly open up a new document (Ctrl N or File>New). Then click on the brush tool in the tool palette. Now in order to choose a particular brush, look at the toolbar and you will see on the left, just to the right of “Brush” there is a number (the size of the current loaded brush) and a drop down button (see picture 2).
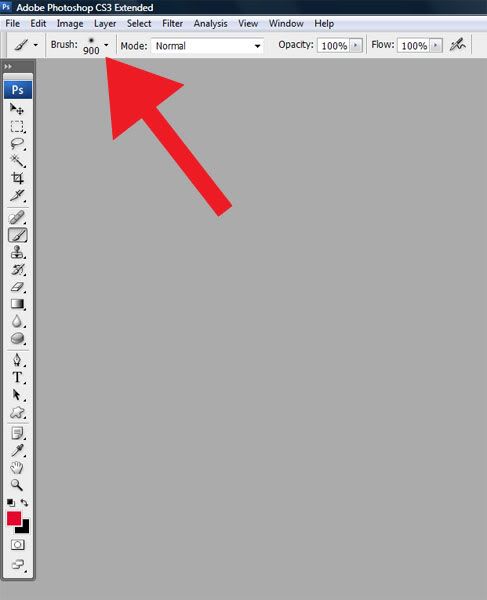
Picture 2
Click on the drop down button and you should then see thumbnails of the brushes that are currently loaded into Photoshop (Picture 3).
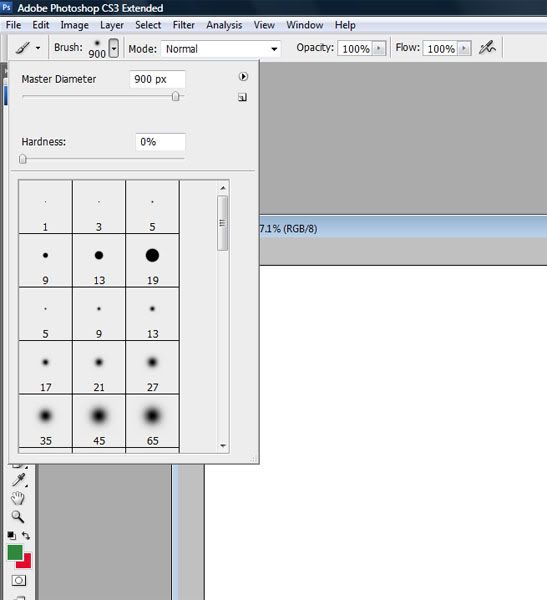
Picture 3
Then select the brush you want to use. If you have not used the brushes before, then the default brushes will be loaded automatically. However, if you know you have a particular brush that you want to use and it is not in the thumbnails, click on the drop down button to the right of the thumbnails. This then gives further menu options (see Picture 4). Note: If the thumbnail is too small to see clearly, just click on “Large Thumbnail" to make it larger.
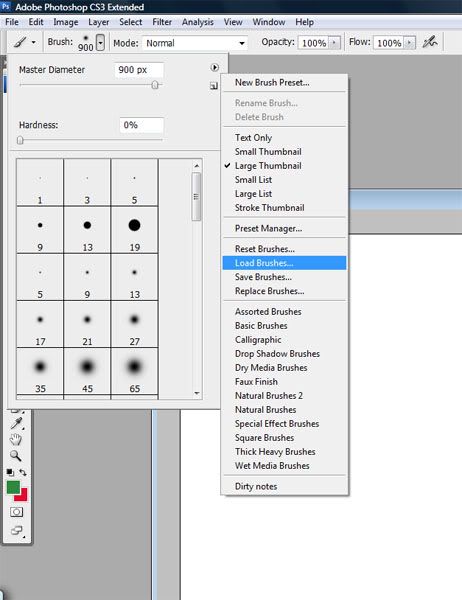
Picture 4
Click on “Load brushes” and then browse through to where your brushes are loaded. The default brushes are usually in the Photoshop preset files (you can usually find these under Presets in the Adobe folder in your Program Files) but it is a good idea to have a completely separate folder for your brushes (as well as actions, styles, patterns, etc). You will find that once you start collecting brushes, patterns, styles, etc, your Photoshop preset folders become very full and can slow the program up considerably. I actually have a separate hard drive for all my scrapbooking stuff, including all presets (as well as a further external hard drive for back up!).
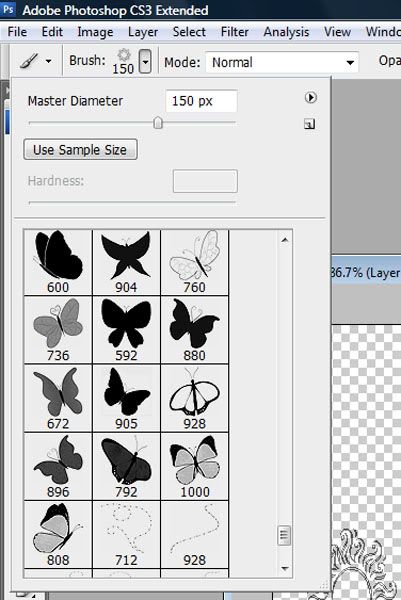
Pick the brush you want to use. I am going to use some Obsidian Dawn brushes as shown here in Picture 5 to make a butterfly overlay:
Picture 5
If the brush is too big or too small for the size of your canvas, then you can change the size by either going to the brush menu and changing the brush diameter (the master diameter in picture 5) or by using the square brackets on your keyboard (“[“ to reduce the size or “]” to increase the size).
Open a new layer in your document (either use Shift+Ctrl+N, go to Layer>New>Layer or create a new layer in the layers palette by clicking the second button from the right at the bottom of the layers palette). It is better to get into the habit of using a new layer for each brush as otherwise, you can find yourself painting over your background paper and not being able to undo it, whereas if the brush strokes are on new layers, you can edit them far more easily. If the worst comes to the worst and you have made one brush stroke too many, you can always delete the brush layer. If you only have the one layer and have used all the brushes on that, then you may end up having to start all over again as you may not be able to undo or edit out all the brush strokes.
Check the colours in the colour palette are the ones you want to use and then just start using your brush.
I started with a transparent document (since I am making an overlay) and then used one of the butterfly brushes and a trail to produce a set of butterflies in flight (picture 6a).
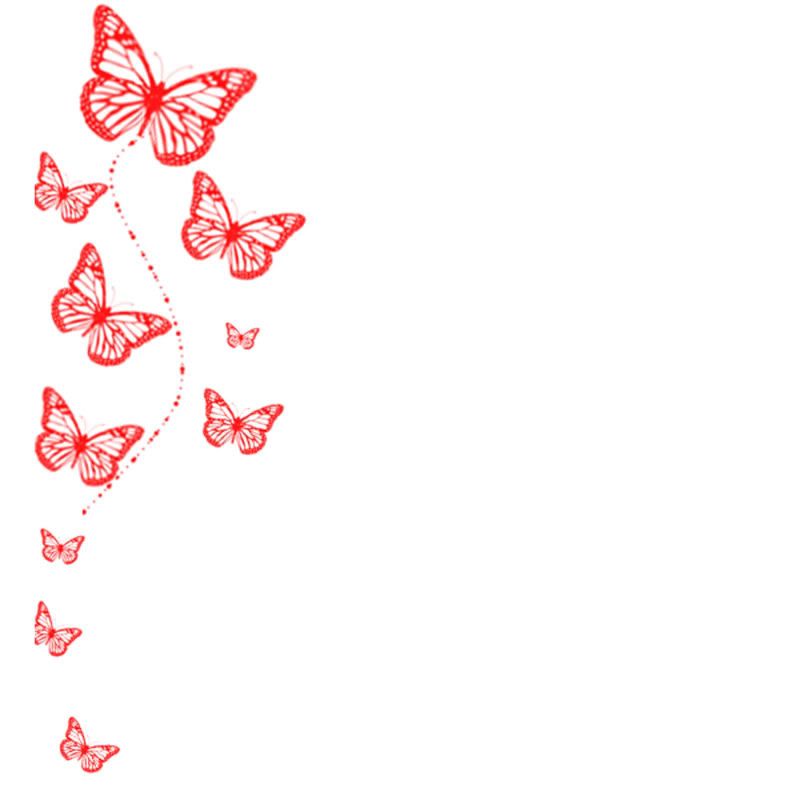
Picture 6a
I then desaturised this (Image>Adjustments>Desaturate or Shift+Ctrl+U) to take out all the color and ended up with a grayscale set of butterflies as shown below.
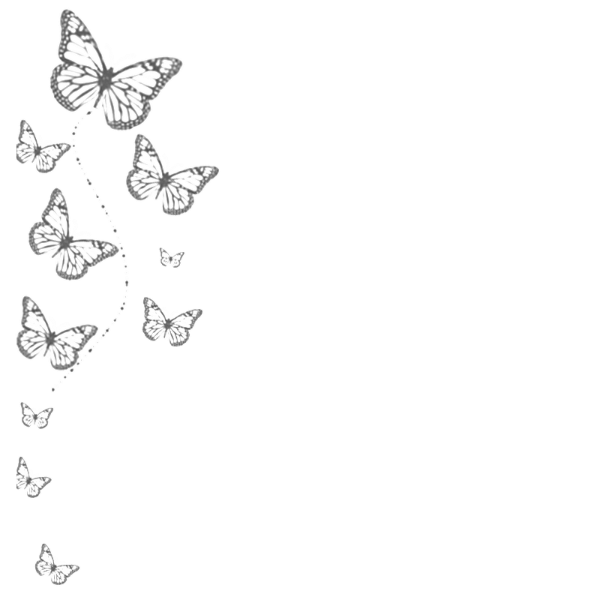
Picture 6b
Once you get that far, it is then a case of just using the overlay either in a layout as a separate layer or design your own a paper by adding new layers above and below and playing with textures, patterns, blending modes and so on until you get the desired effect.
In my case, I carried out the following steps:
1. Added a new bottom layer and filled that with a colour;
2. Created a middle layer using a photo I had previously taken of some marble (see picture 7).

It is not a particular good shot as I could not keep the camera still, but that really doesn’t matter too much when using the photo as a texture or background pattern, which is just as well seeing as it is a really blurry photo!
3. Desaturised the marble photo and increased the size to fill the canvas completely (use the transform tool);
I then had three layers and so I played around with the blend mode (see picture 8) of the photo layer and the butterfly layer to get the effect I wanted.
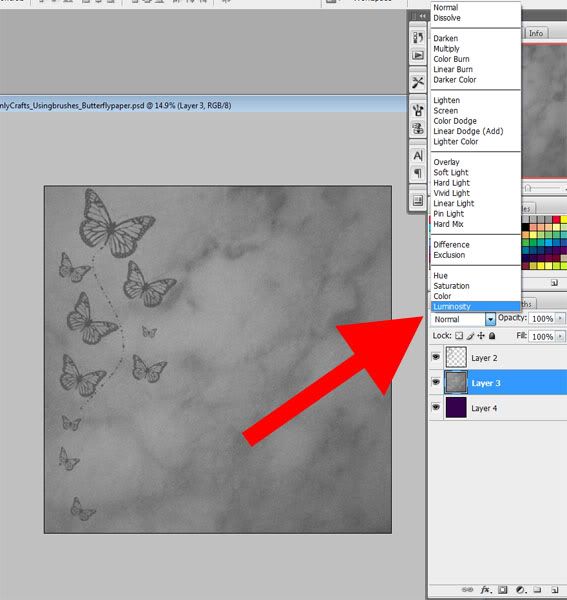
Picture 8
I ended up with a selection of four papers as follows:
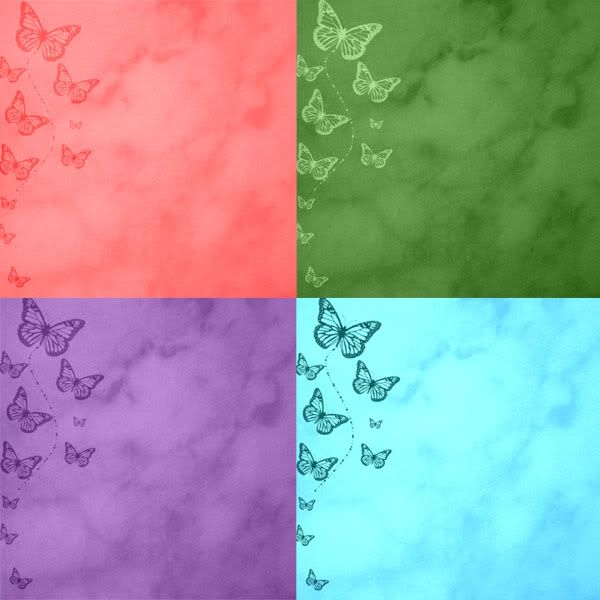
Picture 9
As you can see, the marble photo, even though it was blurry, has added a cloud effect to the paper, and the use of the blend mode has changed the way the colors and butterflies look.
Why not have a go yourself and see what you can come up with? There is no such thing as a wrong way to do this – and the undo button is a great help!
The butterfly overlay, marble photo and four papers are available as a free download here.
Note: this tutorial was first published in Bellascraps


Well, Christmas is only 11 days away and I am totally disorganised, with very little done and a to do list a mile long! It seems like it was only yesterday that I was getting ready for last Christmas (and panicking as usual about how much there was to do!) and here we are, a whole year later. I just don't know where the time goes! And yes, I know I keep saying that, but it is so true. I have, however, had a few minutes to spare and made these glitter ogverlays. They were so easy to do - two of them are from commerical use overlays I have, and the other two I created myself from scratch. It actually took longer to save them, zip them and uplaod to 4shared than it did to create them all in the first place! And in case you are wondering (although I realise you are probably not bothered!), I made the two on the right.
As promised, it is commerical use friendly, so feel free to download either here or by clicking on the preview.
I'm off now to finish off a set of accounts and then perhaps make some Christmas cards (long overdue, I know, I should have made these weeks ago!).


 Posts
Posts


