
Isn't it gorgeous? I've linked the preview to the shop at the Digital Scrapbooking Studio in case you want to take a closer look.
I decided to make two card box sets to try and show the versatility of this kit. Whilst it is meant to be more of a Mother's Day kit, there are definitely some more masculine papers hidden in there. Whilst I was not completely successful in making a masculine card box set, these are what I came up with:

The box was a basic
template found on the internet but I made fasteners by punching out a 1"
scalloped circle on kit papers and then cut out two of the kit brads for the
inside of the fasteners. I added the ribbon
from my stash and used my cropodile to insert the eyelets.
The "Happy
Birthday" was made using the kit alpha, printed onto photo paper and then
cut out and trimmed with a background layer of paper added.
The two butterflies
were from the Tim Holtz/Sizzix Fanciful Flight die and I added the bakers twine
from my stash to complete the cards.
One of the other two
cards was made using the scraps of paper left after I had cut out the card
backgrounds, with brads from the kit covered in glossy accents and attached
using 3d foam pads. On the fourth card I
cut out one of the buttons and added gemstones. The red and green banner effect is from papers where I used
the Vintage Lace die by Tim Holtz/Sizzix. It's actually made using the left over paper once you pull off the die cut lace!
This is the second set I made:

The box was another template from the internet and the flower on the front of
the box was from the kit. I printed two
copies of the flower, fussy cut them out and then cut down each petal before
sticking the flowers together and onto the box.
I curled the petals slightly to give more of a 3D effect.
The cards were
created using papers from the kit and plain cardstock whilst the flowers were made using my Tim
Holtz/Sizzix tattered florals die. I love that die and am always using it! The
lace effect borders were made using papers from the kit and the Vintage Lace
die, again from Tim Holtz/Sizzix. The
"Happy Birthday" was from the kit alpha as noted above.
Both sets look turned out really well, and jut o to show how you can create two completely different sets of cards using the same kit. You have to love digital papers, because you can just print off the ones you need and you never run out!
I'm off to go read a book now and have a glass of wine, so happy scrapping!


Well, it seems an age since Mum and I went to Alexandra Palace but we had a whale of a time. We left home early and managed to get to Ally Pally about half eight in the morning, so were able to get a parking space just outside the Ice Rink. We then had a gentle wander around to the entrance and whiled away the time with coffee and a bacon baguette which we shared!
The queue to get in was already starting to build up when we got there, hence the coffee break as mum can't stand for long, We went in after the first rush and I did think that since there were far fewer exhibitors than at the NEC we would be in and out in a couple of hours. I was so wrong in that as by lunchtime, we had still only reached the second row of stalls (we started at the bottom and worked our way back to the entrance)! I managed to spend all the money I had left over from the NEC plus some extra on top so it was a very successful day!
I still haven;t had chance to do much as yet as my other news is that I have become a Stampin' Up! demonstrator. I have a new blog for this (well, all I have is the original page and the blog name as I haven't had chance to post anything or even change any of the default layout as yet but I am hoping to get all this sorted this weekend and will let you know the details then!
I've actually been busy these past few weeks spending most of my time at a client's trying to finalise their 2012 accounts and today I finally managed to get the accounts finished and the tax returns filed online so I am definitely in a celebratory mood tonight. I am about to go get a glass of red wine and am only sorry I don't have any chocolate to go with it!
Still, I though I would leave you with a photo of a mini album I made last week. I used Color My Wold by Aimee Harrison Design Studios and she is a star as she even included the proper spelling of colour in the wordart in the kit!

The kit is lovely, and is definitely the sort of thing you can easily use for albums and cards, it is so versatile. I have plans to make a couple of birthday cards with this but as usual, work has taken priority....still, it is the bank holiday weekend coming up, so who knows?!!!!
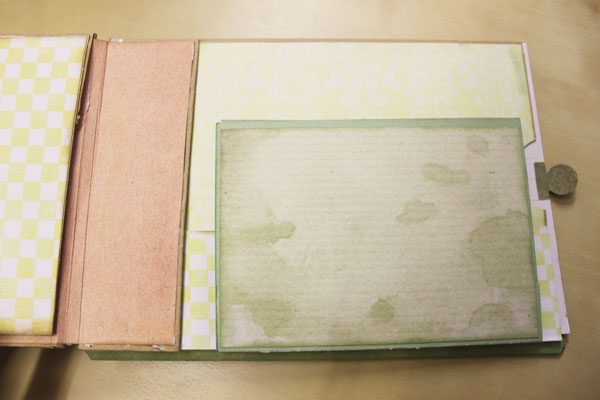
Anyhow, back to the mini album and here it is:

I printed one of the kit pages on top a sheet of A4 cardstock and then folded and cut the card to make the album. the lace effect on the edges is from another kit page which I used my Tim Holtz Vintage Lace die on. I printed and cut out two copies of one of the flowers and then added a gem to the centre before gluing onto the front cover of the album.
Inside, the pages were stuck together using buttons printed from the kit to make the holders for the tags. The tags were made from the kit using papers and elements. I left the backs of the tags blank so I could add journalling, and there is space on each tag for mini photos.
I love the way this turned out and it was so easy to make, too. As usual, though, it took longer to cut out and stick everything together than anything else!
Oh well, that glass of red wine is calling my name now so I'm off to celebrate filing those tax returns!
Happy scrapping!


