I've been busy with craft fairs again and seriously need more hours in each day to get some Christmas cards made! Why is it that time just drags when I'm preparing accounts yet flies away when I start crafting?!!! Hubbie is forever coming into my office to see what I am up to and it is only then that I realise several hours have passed since the "I won't be long" comment I made to him when he asked me what time I would finish..... Seriously, someone needs to put him in a time warp or something for me so that as soon as I say a time, he goes into the time warp or time capsule or something so that he only comes out when I've finished yet thinks only 5 minutes or half an hour has passed! That way, I wouldn't get into trouble for saying I'll only be ten minutes and then taking two hours to finish up.......
Anyhow,this is the latest project I have been in trouble with for not time keeping properly:

Please excuse the poor quality of the photos. I reckon I must definitely need new glasses as they most certainly looked like they were on focus when I took the photos!
This is a one page album made using a single sheet of kraft cardstock and this amazing kit from Digilicious Designs:

Isn't it gorgeous? I love those colours and that parrot is so cute! Even better, it is currently on sale at only $9 for the whole bundle - a real bargain ;).
I matted the album with kit papers and, of course, had to use my distress inks too...I don't know how you feel about Kraft card stock but to me it just seems to cry out for a bit of distressing. I don't think I could use it without getting some ink on it! The ribbon was added before I adhered the paper to the front and back cover - I have learnt from experience to think first, then stick, as I have been known to leave the ribbon until I've almost finished an album and then have problems trying to cover up the fact that I should have placed the ribbon under the paper, not on top!
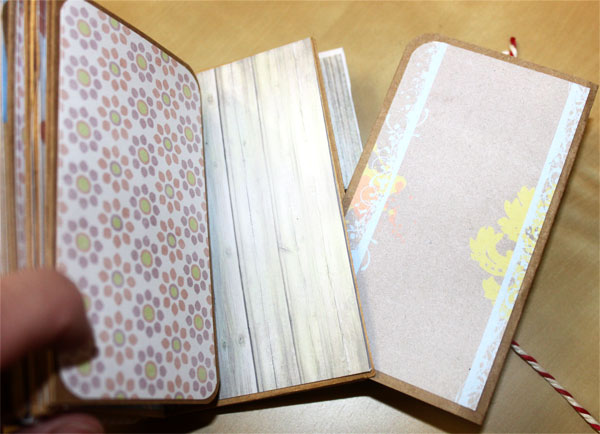
Anyhow, this is the inside of the album:

As you can see, I made pockets for all the pages except the first one (but there were also pockets between the album pages due to the way I cut and folded the card stock) and then created some tags in Photoshop (there were none in the bundle). I made the label using my ever faithful Stampin' Up! round tag punch (unfortunately, this is now retired :( ) and rounded the corners. I must confess, I did have to trim each tag slightly due to me being somewhat overenthusiastic with the glue when sticking the edges of the pockets down but I take the view that this is a prototype album and therefore I definitely have room for manoeuvre when it comes to making mistakes!
Here's a close up of the tags:

The clock looks really effect (imho) on the tags and I was so pleased with how that brad turned out (on the tag second from the left at the top). It is actually just cut out and stuck to the tag using 3D foam pads but it looks so realistic in the photograph and oh dear, I've just noticed from the above photo that I've managed to leave a bit from the top of a 3D foam pad underneath the parrot...you just can't get the staff, can you?!!!
Let me know what you think and please, have a go yourself at this as the one page album is really quick (well.....that would be quick in my idea of time, and you only need to ask hubbie how inaccurate that can be ;) ). Well, I'm off to finalise a set of accounts now and with a bit of luck I'll be able to get some more crafting in later on.
Happy Scrapping!
Well, this is one of the projects I had every intention of completing whilst we were on holiday but without my scoring tool, I was completely lost! So, this weekend was an ideal time to catch up and get this finished, so after a couple of evenings work, here it is.
I was lucky enough to have the chance to work with the July Project 365 kit form Digilicious Designs and it is truly scrumptious:

The polka dot paper is gorgeous, and the tags are just perfect. I really love this kit. Mind you, I've said that about the earlier six months' worth too ;)!
Anyhow, this is what I came up with:

I made the cover from A4 cardstock and covered it with paper on the front but inside, I used kit papers printed on card for added strength as the cardstock was rather flimsy for a cover. The scalloped edged paper was made using a Stampin' Up! punch and the lace was bought whilst on holiday in Wales. I used two pieces of lace and placed them back to back so the edges overlapped to form a solid line.

It looks rather effective, doesn't it?
I finished the cover off with washi tape at the top and bottom. I think this may be Tim Holtz tape but can't be sure - I really need to start keeping a proper record of exactly what is in my stash so I don't end up buying the same thing twice, which I have done before (and I know I am not the only one who does this!!!). I nearly bought a Stampin' Up! die that I already have last week - now that would have been an expensive mistake ;).
The inside pages were cardstock covered with the printed kit papers and embellished using elements from the kit:


These Project 365 kits are really just made for making albums. They are gorgeous and the great thing with them being digital, is you can print them out to any size you want so can make a large(ish) album like this one or a small one using wages envelopes for instance. I just love the adaptability of digital kits!
Well, the next album I make I am going to try and remember to take photos in the process as I am keen for as many people as possible to try these out!
Well, a glass of red wine is calling out my name now, so I am off to answer the call. And before you ask, I do only have the one glass (and no, it is not a pint glass ;) ).
Happy Scrapping!
I can't believe it is over two weeks since I last posted! The time has flown by and yet again work has been busy, but this time, I also managed to fit some crafting time in, including helping at the Stampin' Up! demonstrator table at the Wrexham Artstamps Fair. That was totally exhausting but such fun!
Since then I have been desperately trying to get this album finished. I was using one of Christine's gorgeous Project 365 kits, this time the June one:

Isn't it gorgeous? Mind you, I say that about every month's Project 365 kit as I love each and every one of them ;)!
Well, this time (just for a change) I decided to make an album and this is what I ended up with:

The above is the front and back covers, the first two inside pages ad some close ups of some of the elements in the album. Just look at that bird - there is such depth to it, even though it is just printed on cardstock and cut out so is completely flat.
The flowers on the front cover were made using Woodware punches - I have 3 flower punches (the same basic shape) in different sizes so they were ideal for this.

And the above photos are of the remaining inside pages. I used the notecards from the kit as journalling cards and then printed and cut out the elements to add to each page. The ribbons, eyelets and baker's twine are from my stash and the album is made from kraft cardstock with the papers matted and the edges distressed for effect. the whole idea for the album came from Kathy Orta at Paper Phenomenom. That girl is sooo good! this album was adapted from the Mini Album Canvas Art, although obviously, I only made the album (resized to fit the cardstock I had) and missed the canvas.
Oh, and the curled flowers in the top right of the above photo? I printed paper in a circle shape (using Photoshop) onto plain white cardstock. I then cut out the circle and cut it inside on ever decreasing circles so I ended up with one long circular piece of cardstock which I then curled up to make the flower.
Not bad, eh (and modest too as always!!!)?!!!
I'm actually finding it easier to make these now so obviously, all the practice has paid off! Plus I have my first commission!!!! My daughter's boyfriend has requested one for his mum and is actually going to pay me too! Woohoo! Only trouble is, I need to find the time to make it now!
Well, that's all from me for now. I need to crack on with work and also have a kit form Aimee Harrison that I need to get started. I'm thinking of making cards and printing them out so no cutting and glueing this time around! I honestly don't know how I will manage it....I'm sure to end up adding ribbon at the very least!
Happy scrapping!
In May I had the chance of working with the Project 365 May kit by Digilicious Designs and it is scrumptious:

Lovely colours, amazing kraft papers and some really yummy quickpages, papers and elements! What's more, they are all on sale at the moment too, so why not go snap up a real bargain while you can?!!!
One of the great things I love about digital kits is that you can not only use them digitally, but you can also print them out and create hybrid items with them. With the May project 365, I had a field day! The first thing I created was a mini envelope album. I started with 6 small money envelopes from Tesco's (they measured 12.2 cm by 7.7 cm (4 13/16" by 3") and were really cheap, another good point in their favour!) and this is what I ended up with (please excuse the poor quality of these photos. I only have artificial light in my office and sometimes, even photoshopping the results just does not show the true colours of these projects):

The envelopes were used to make the pages and then I made the covers from empty ice cream cone boxes! I added the heart brads at the front and back, mainly to keep the covers attached to the central binding as I had trouble getting it all to stick together ;). The fastener was made using my cropodile and baker's twine. In case you are interested, I got the baker's twine a while ago from www.butchers-sundries.com. I know, I know, getting craft items from a butchers website, absolutely shocking, but believe you me, you get far more baker's twine for your money from them than you do from the craft websites. It is fairly thick twine though, and only comes in three shades (red/white, green/white and blue/white).
I then added inserts and tags as you can see below:

The inserts were made from kraft cardstock which I picked up at Ally Pally in March. And don't you just love the printed cardstock from the kit

They were double inserts as you can see and they folded over and fitted perfectly into the side of the album:

Love the blue flowered paper too ;)!
I really had a lot of fun making this album and either I am getting quicker at making them, or else the smaller size made a huge difference (or maybe it was a bit of both?!!). When I made the A5 size album, it seemed to take forever, probably several days' work (although not all in one go though) whereas this was several hours instead of days.

Well, I couldn't stop there, now, could I? I managed to get my hands on the hybrid trufflebag template by Carin Grobe Design:

The template is so easy to use but just one word of warning. Don't cut out all the semicircle on the lid like I did - you only need to cut out the curved part of the semicircle, so it can be folded over into the hole underneath to fasten the bag. Sigh, I guess I should read the instructions properly before snipping away at everything!
Still, with a bit of glue and some gems, I managed to rescue the whole thing! So firstly, here we have the birthday card:

This was made using the Project 365 May kit again, and I printed the hearts and the paint strokes onto a sheet of A5 cardstock. The flowers were punched from kit papers (I used Woodware punches) and added gems to the centre of each flower. The leaves were also from a kit paper made using a quilling leaf die and then I used a crimper to get the crinkled effect. The "happy birthday" was printed on to photographic paper, trimmed and then adhered to one of the kit papers and trimmed again before sticking to the card with 3D foam pads. All in all, I love how this turned out. And, of course, the great thing about it is that I can create the same card over and over again as I will never run out of the kit papers and elements since they are all digital!
So, the truffle bags........even with the slight hiccup with the fastening, I am really please with these too:

Aren't they just the cutest thing you've ever seen?

They are gorgeous, absolutely gorgeous and really just finish the whole set off perfectly:

Even hubbie was impressed!
Well, I now need to post the items I made with one of Aimee's kits, so I will be back shortly to show you that!
Happy Scrapping!


